My husband and I recently moved within the San Jose area and are now renting from a relative. Renting from a relative comes with certain perks, such as paying a lower rental rate (we're definitely not paying the market rate courtesy of relatives) and being able to do a few customizations here and there. Our rental place was used as a rental home for the past 15 years, so there is definitely some updating to do. As I am awaiting starting my new job, I figured why not try to DIY some things. After all, I did DIY quite a few things for our wedding -- flowers, wedding favors, etc.
Because my husband and I aren't sure exactly how long we'll be living/staying in the area, because the cabinets are still working and not quite falling apart, and because of budgeting, we decided to paint the kitchen cabinets to give it a new, fresh feel. We also thought painting would be a relatively quicker way to allow us to move in and start getting settled, since our flooring project alone took over 3 months for signing, material ordering/arriving, and project completion (click the link and read the review by Nicole G. to learn more about our flooring project).
I decided that I wanted the kitchen to look bigger and brighter with a color that would work well with a gray/cool tone. Since we weren't planning to do a full remodel and didn't want to change out the granite countertops that were already there (because of budget), I decided to go with a plain white color. It's simple and neutral, which is the perfect complement to the busyness and colors of the granite countertops. The color also allows for the floors to stand out on their own too.
First, I figured I should learn how to "properly" apply the paint.
I watched several Youtube videos and researched blogs along the way for the type of paint I would need and how to even begin with painting cabinets. From what I found, the "proper" way to paint cabinets is to remove the cabinet doors and accompanying hinges, sand them down so the new paint will hold, caulk and seal any areas if needed, then use spray paint for the cabinet frame and cabinet doors. Once they've dried, reattach the cabinet doors, and you're done!
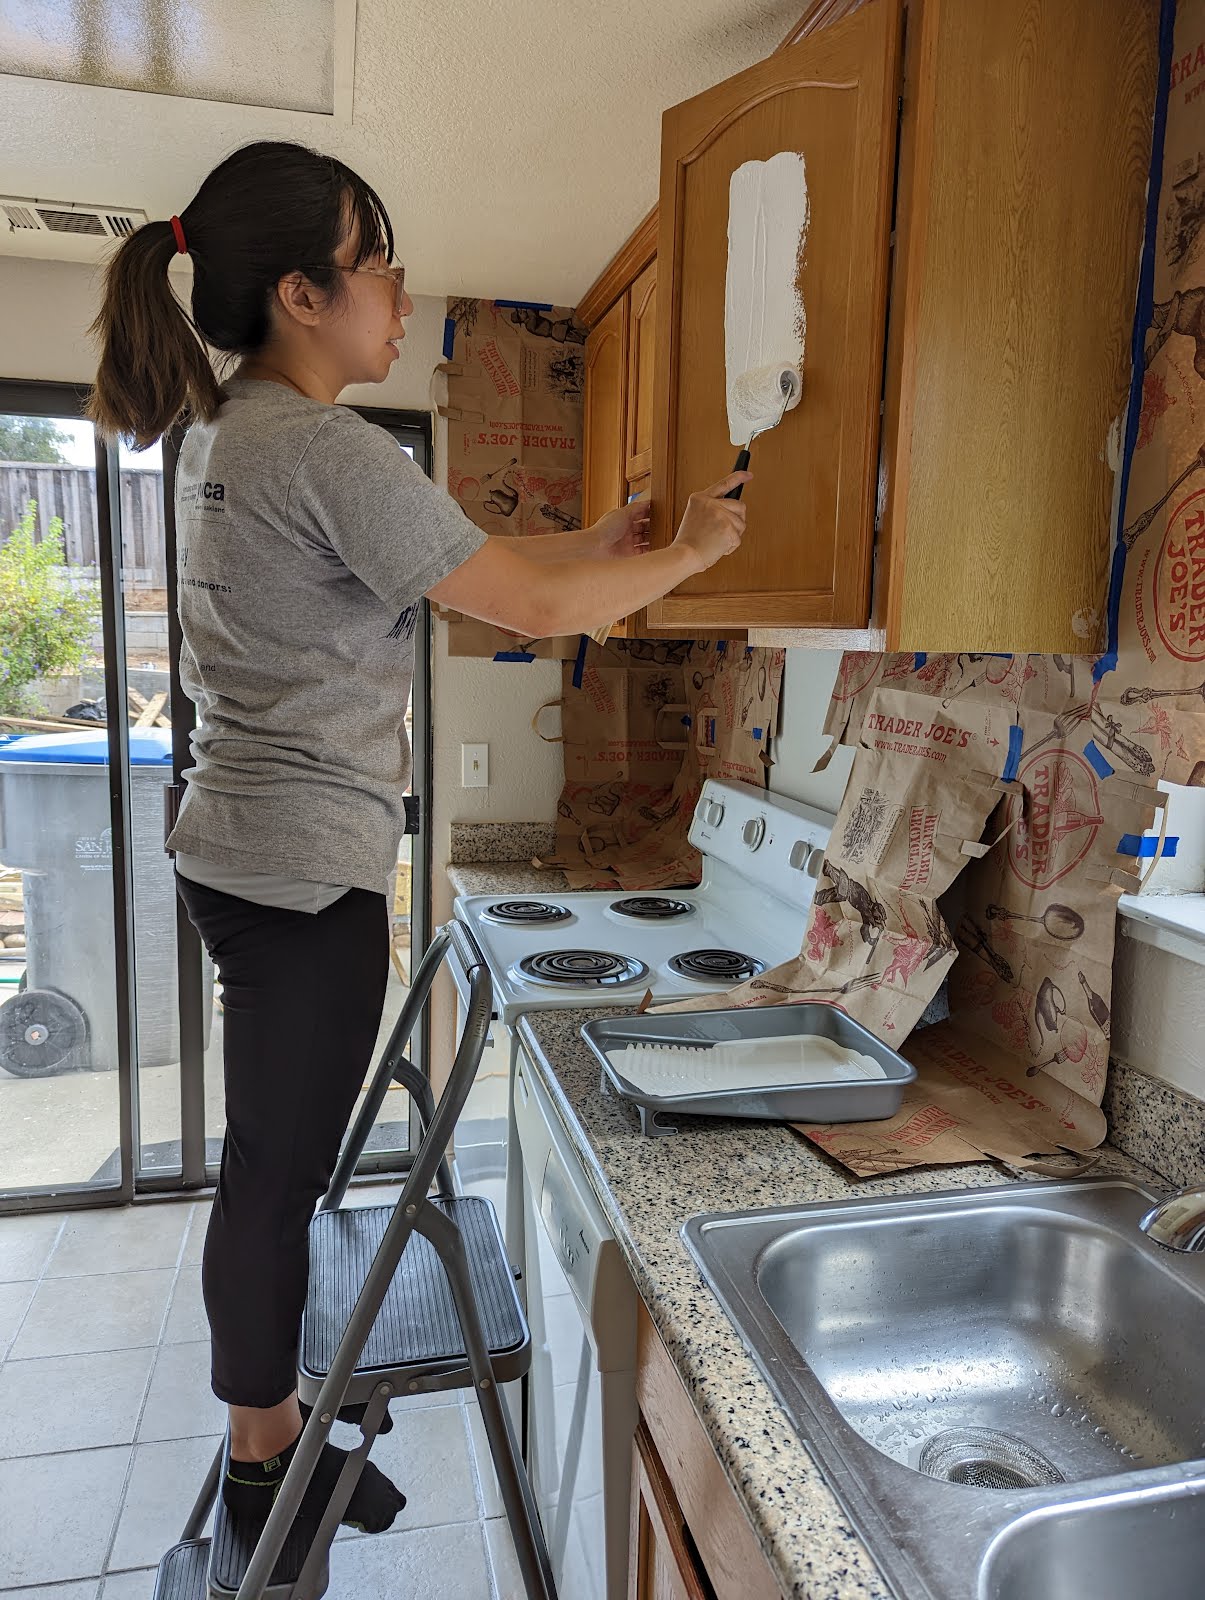
Alternatively, you could just paint the cabinet frame and doors with a roller and brush, but you'll need to be detailed and thoughtful about covering the areas that would have been exposed had the cabinet doors been removed. Sanding first, of course! Because we didn't really have any painting tools to begin with and our long-term plan would be to replace the cabinets (if we stay in the area long-term), I decided to opt for just painting with a brush and roller. If you opt for this yourself, I recommend buying some painter's tape and lining the inside of the cabinets prior to getting your paint project on.
Now, about the paint.
Researching and buying paint was not too difficult at all surprisingly. I turned to a quick Google search to learn about the different paint types and finishes. Most of my readings from blogs and home remodeling pointed to latex acrylic paint as the paint of choice and a semi-gloss finish as the finish of choice. I also turned Pinterest and found a very useful infographic. I simply typed up the key words "paint types," and found several infographics such as this one below.
 |
| Credits to DesigningIdea.com |
I looked online at our local home improvement stores and found that the Behr Premium Semi-Gloss Enamel interior/exterior cabinet, door, and trim paint fit the bill. The paint was also budget friendly as well. We went with a 1 gallon pail. Since my home DIY painting project would include painting the doors and trim, it didn't really matter for me if we purchased a little extra paint. I ended up painting two coats (plus a touch up coat) of paint to get the cabinets to the shade of white I was looking for. I ended up having about 1/2 to 1/3 of the pail leftover afterwards.
Next, it's time to buy the materials and get the project going.
List of the materials we used for our project:
- Behr Premium Semi-Gloss Enamel interior/exterior cabinet, door, and trim paint in white color
- Paint kit (includes roller in two widths, paint brush, and paint tray)
- Painter's tape
- Brown bags/plastic bags to line the areas you don't want paint to get on
- Medium grit sand paper
- Clorox wipes (or anything that can remove grease) - if your cabinets are greasy
- Vacuum (to clean up any dust from sanding)
- Cabinet knobs and handles in silver satin color
Steps we did for our painting process:
- Line the areas you want to prevent getting paint on with paper/plastic bags and painter's tape (ie. ceiling, walls, floor, etc).
- Line the inside cabinet areas the same.
- Wipe down countertop and cabinet surfaces that will be painted.
- Sand down the cabinet surfaces that will be painted. We did this ourselves by hand.
- Vacuum any dust from the sanding process.
- Wipe down the cabinet surfaces that will be painted again to ensure that you have captured any remaining dust. This prevents uneven surfaces once you paint.
- Paint your first coat. Allow time to dry (refer to the guide on the paint can you purchase for dry time).
- Paint your second coat. Allow time to dry (refer to the guide on the paint can you purchase for dry time).
- Paint your touch-ups (or a third coat if you're going from a very dark color to white). Allow time to dry (refer to the guide on the paint can you purchase for dry time).
- Install your knobs and handles.
- Paint your touch-ups. Allow time to dry (refer to the guide on the paint can you purchase for dry time).


Last, but not least, add the finishing touches!
Since our cabinets were now white colored, I decided adding some knobs and handles would be a good way to decrease the need for clean up or paint touch ups from frequent cabinet use. There are a couple of cabinets I knew we wouldn't use often (ie. the ones hiding the suction fan pipe above the stove), so those didn't get any fixtures added. Since we were going for a light and bright look, we went with satin silver finish knobs and handles. After researching prices on these, we ultimately purchased them from Ebay.
I'm sure you're probably wondering how much this project cost us in the end. The grand total of our project (not including our time, of course) was $94.33. I still even have paint leftover for painting the doors and trim, although I am not quite sure how many doors I will be able to realistically paint. This was pleasantly surprising, given inflation and rising costs. We are overall happy with how our cabinets turned out and believe they'll last us some time!
-----
.png) |
| Found the post useful? Pin the image to share! |
Are you now inspired to DIY your kitchen cabinet makeover? If so, what color scheme and/or cabinet color(s) are you going for?
Nicole G.
Post a Comment
Share your thoughts and comments below!